What is YARN and npm

yarn to JavaScript, is what composer is to PHP, a dependency manager, meant to replace npm, but still works with npm

package.json is the file that dictated the dependencies for npm

So, a small comparison of yarn commands (executed in the terminal in the project’s directory which produces a build directory within that directory), the build directory is what you serve the world, in other words, it is what you put in your website’s root directory !

Tasknpmyarn
Create the build directorynpm run buildyarn run build
Update all packagesnpm installyarn (synonyms to yarn install)

Gnome terminal tab title

To tell tabs apart fast, you can give every terminal tab a name, just execute the following line inside that terminal window

echo -ne "\033]0;SOME TITLE HERE\007"

I am doing this on the default gnome terminal in Debian 11/12 (Bullseye/Bookworm), older methods no longer work

You will have to execute this every time in every SSH window to a remote machine, I am looking into a way to making the name permanent !

Does this work with putty on windows?

YES ! I have just tested this with the latest putty (2024-11-02), two and a half years after posting this for terminal in gnome, and I can confidently say it does…

Laravel Tutorial: Blade part 1

The simplest Blade tutorial !

Disambiguation: This tutorial is about Blade, the template engine for Laravel…. I am covering blade on Laravel 9, but I am also taking into account that you might be maintaining code from blade 5 !

Why yet another blade tutorial ? they are all over the place !

long as this tutorial may be, it should be an easy read. no need to memorize stuff or write notes, I am trying to structure it in such a way so that you can effortlessly understand the concept, then come back for that one little syntax you have forgotten very easily.

Simply put, i think blade is a very simple framework that you can complicate if you insist, I think there is an easier way to get someone up and running with blade, a tutorial that compares the Blade way to the traditional way, does not invoke flashy abbreviations before explaining what they mean, and serves you the simplest explanation first… Also one that involves illustrations, shows the different features and explains how they differ and when to use features and why…

I’ll leave the flashy terms and history lessons near the end of the tutorial for completeness, and because they may be useful, but not before you are comfortable with Blade.

Why not a video tutorial

If this gets any attention, I will create a video from it, but I personally prefer reading and looking at illustrations.

What is blade in simple terms ?

Traditionally, when creating a website in PHP, your HTML is mostly in the same PHP files that provide the functionality ! blade is here to help you separate your HTML content from your PHP functionality…

Blade is a special folder in your Laravel project where you add those PHP files that contain your HTML*, plain old folder where you simply separate those files from the rest of your code. files in that folder enjoy extra functionality provided by blade that takes out the inconveniences of separating the HTML.

in your Laravel project, that folder is usually /resources/views, blade PHP files end in .blade.php, for example, mytheme.blade.php

* HTML And JSON if you are also writing an API…. and whatever you normally add to your HTML such as inline CSS and inline JS

Isn’t Separating my HTML into it’s own files a lot more work ?

Well, that is what blade is for, it provides tools to make this simple and easy

Traditionally, if you wanted to separate the HTML from the rest of your code, you would create PHP files with the HTML in them, and use PHP’s include function to show them… or embed the HTML inside functions that are in separate files, and send the data to those functions (or classes) and print what is returned…

That works, and blade is more or less the same thing, but as you proceed with Blade, you will see how blade resolves many inconveniences that this method comes with.

Let’s get down to it !

Setup Laravel on your system

First, I am assuming you have already setup Laravel and created a new project, if not, please take a look here (/2022/09/07/laravel-tutorial-laravel-setup/) for instructions on how to do that !

Create a couple of dummy routes

Now that you have such a setup, We will need to add a couple of routes (URL definitions), don’t concern yourself with what they are or what they mean, they are covered in the next section, they are just here to enable us to learn blade, routes is in a totally different place, all you need to learn for now that those two routes are invoked when you visit the URLs they define, and they pass the variables you see in them to the blade templates

Routes are added to the /routes/web.php file, so open that file and add the following at the end of it, now you have two URLs that work, the home page, and a /test page


First Blade File: plain HTML and nothing more

Now, let us create our first BLADE file, let us call it example.blade.php, and in that file, we will simply add an HTML page with nothing to do with blade specific features, Just that page that will display whether you use the home page (the first route from above), or the /test route that you see in the other route !

—————–

Unorganized content to be incorporated into the tutorial

If you stick to a couple of rules, it is compiled into PHP code and cached, so it is really fast !
Asset helpers
Layouts (extends, Yeild, section, show)
Partials
Components: includes, arrays vs collections {{$var->entry}}, props, <x-cards>,

BLADE  is inspired by .NET’s Razor engine.

Allows you to use PHP code inside (@php directive), but you should not need to, and you should not unless you have to
(If you feel a need, you are misplacing your code)

If you come from Symfony, you can use Twig through Twig-bridge !

Syntax

1- Echo
{{ $variable }} is equivalent to <?= htmlentities( $variable ) ?>

Sometimes you may need to echo handlebar notation into the output, so you can simply use an @ before the above notation

@{{ $variable }} will output {{ $variable }} (Without the @)

or, if you want things to just print as they are, you can use the @verbatim directive !

{!! $variable !!} is equivalent to <?= $variable ?>


{{ $variable }} = <?= htmlentities( $variable ) ?> 
{!! $variable !!} = <?= $variable ?>
{{-- comment is here --}}


self explanatory blade directives

if elseif else endif (endif is the closing after all of them)

@unless and @endunless = equivilent to if(!cond)

@for, @foreach, and @while (endfor endforeach enwhile)

@forelse and @endforelse = ForElse is a ForEach loop, but with extra handling for empty array.

@forelse ($talks as $talk)
	{{ $talk->title }} ({{ $talk->length }} minutes)<br>
@empty
	No talks this day.
@endforelse

-----------------------------------------------------------
Defining Sections with @section/@show and @yield

yeilds first param is the section name, it's second is A DEFAULT VALUE

instead of yeild, if you want an entier block as a default fallback, you can use

@section('footerScripts')
<script src="app.js"></script>
@show

In this @section .... @show, if we want to append to the default value above, we should include @parent in the child template extending this, otherwise, the contents above will be overwritten !

Note that The @show is in the parent section, shows in place, while the @section and @endsection are in the child !

the section show is both defining a default and doing so in such a way that its default contents will be available to its children, through @parent

to use all of the above... assuming the template is at resources/views/layouts/master.blade.php
@extends('layouts.master') {{-- Each file should only extend one other file, and the @extends call should be the first line of the file --}}

@section('title', 'Dashboard')

@section('content')
     Welcome to your application dashboard!
@endsection

@section('footerScripts')
@parent
     <script src="dashboard.js"></script>
@endsection
-----------------------------------
partials


------------------------------------------------
1: creating a folder called images under public !

---------------------------------------------------

Method 1: @yeild

put the header and footer in one file called layout.blade.php in one peice (empty doc)

within the template, you put in 

@yield('content)

in other layout components, you use the extends directive, and make the content inside
 
 @extends(layout)
 
 @section('content')

whatever needed to appear in the theme, the content that is labeled content just like in yeild

@endsection

partials are added with include, so if you put the thing in the partials directory, the convention is that a file starts with underscore as a partial, _hero.blade.php

include('partials._hero)

Method 2: making the layout a component

---------------

in routes, read on route model binding, instead of passing $id to the inner function and route specification, we pass an object of type listing (The model listing) to the inner function, and in the route specification, the word /blah/{listing}, we  it allows us to just 
Audio Video Libraries at home DLNA etc

This is basically a comparison of free sofwtare that you can install on your NAS or headless linux machine, I am using Debian Bullseye, but that is besides the point

To run webm files (VP9) through miniDLNA, all you need to do is rename the file !

My atom PC (D525) is not capable of transcoding on the fly, so i keep it, and i wrote a script to execute the following command for webm video files (and any other unsupported file) by browsing to the file in the web browser, then clicking on it, a simple script but explaining how to install it is going to take some times with permissions and server config, so i will probably be posting it online and explaining in a different post when i have the time

ffmpeg -y -i output.webm -c:v libx265 -b:v 2600k -x265-params pass=1 -an -f null /dev/null && \
ffmpeg -i input -c:v libx265 -b:v 2600k -x265-params pass=2 -c:a aac -b:a 128k TEMP_OUTPUT.mp4

the most popular of the bunch is MiniDLNA, it does not transcode, and on openWRT it does not even serve video, so it is a good option when you have a PC storing the files, and you don’t need transcoding on the fly ! for some devices that are capable of running VP9 like modern 4K TVs,all you need to do is rename the file !

Universal Media Server : Universal Media Server is a DLNA-compliant UPnP Media Server. It was originally based on PS3 Media Server by shagrath.

OSMC

Streama: Self hosted streaming media server.

Gerbera: Free UPnP media server based on MediaTomb

Openwrt internet via USB from Huawei E5577 or similar devices

If you have a 3G/4G USB dongle, which is not battery operated, just a USB stick, you might want to check out the instructions here

The device I am using at the minute is the ZTE MF920U, I have also used a bunch of similar Huawei devices, they all work in exactly the same way

Start by installing a few packaged, hopefully you are familiar with loggin in with SSH, if not, you can get those packages from within the software section of the luci interface

opkg update && opkg install kmod-usb-net-rndis kmod-usb-net kmod-usb2 usb-modeswitch kmod-usb-net-cdc-ether

Once those are installed, reboot, then login to luci

Connect the 4G modem via USB, then Go to interfaces, then add a new interface, select the new eth device that appeared, give it a name, and you are all good to go

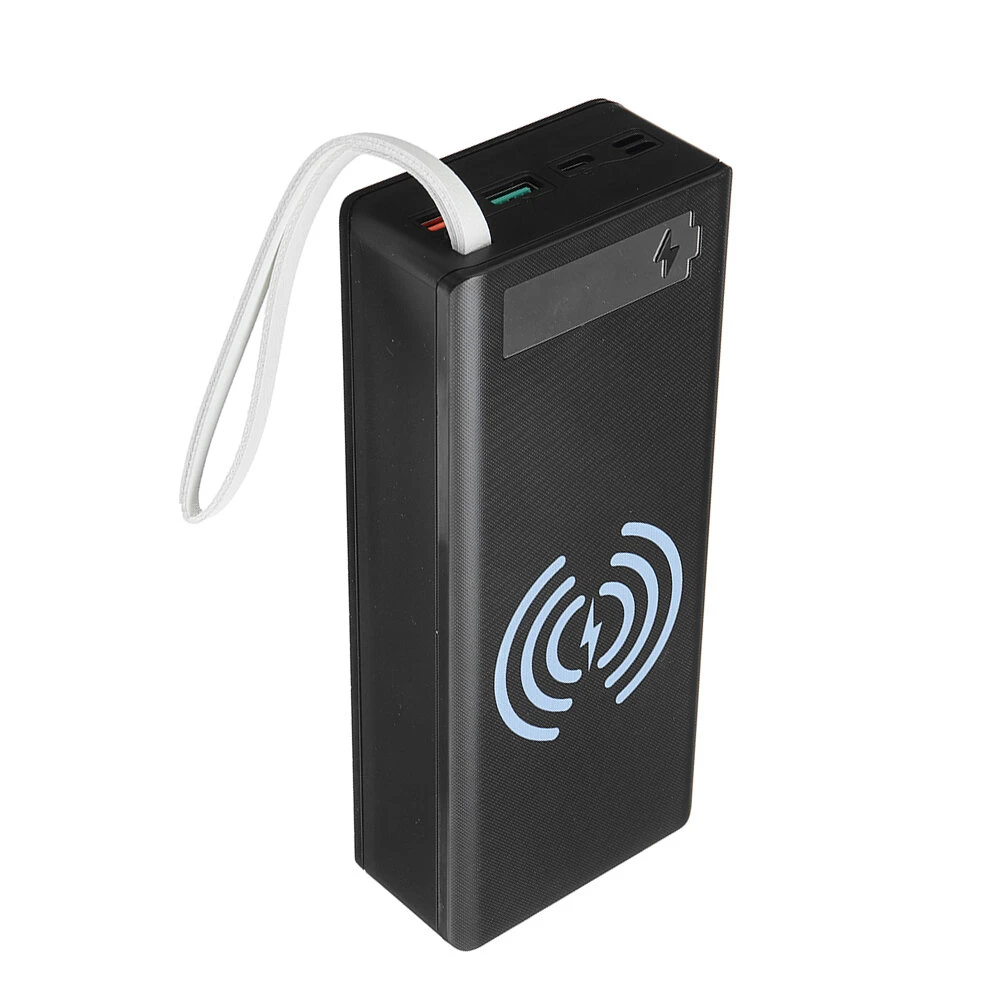
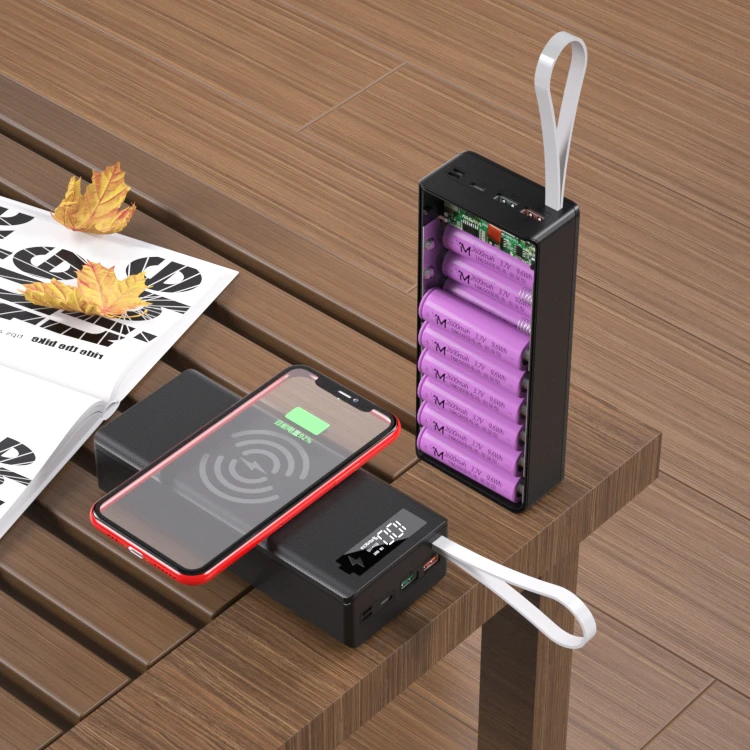
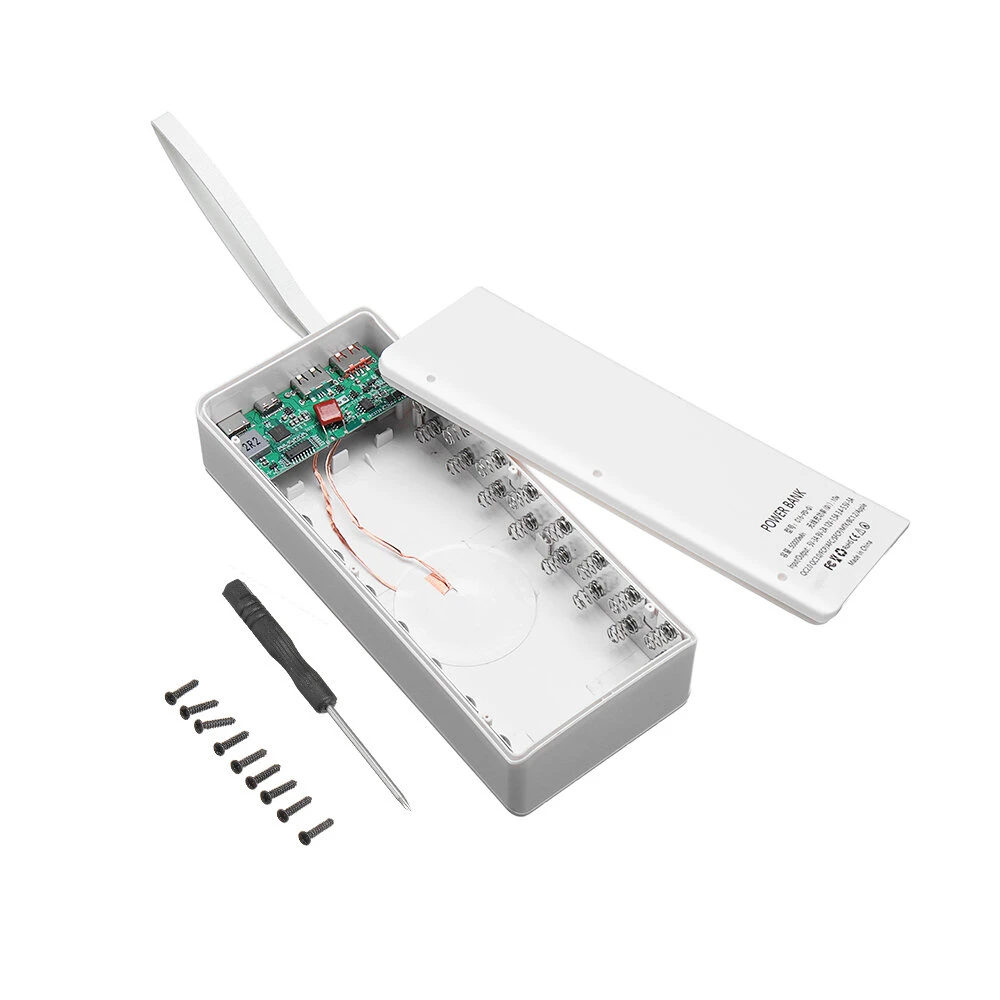
C16-PD-QI Power Bank from banggood

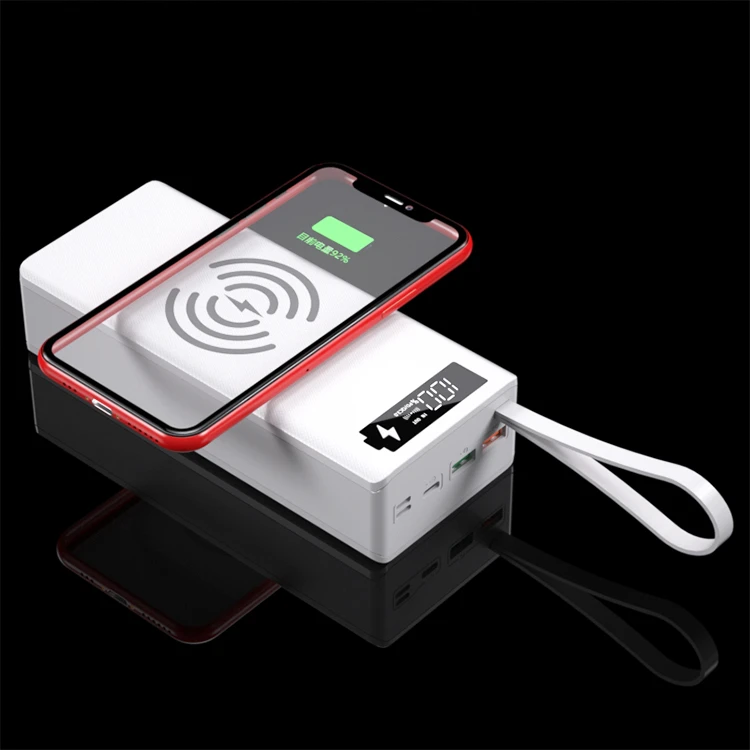
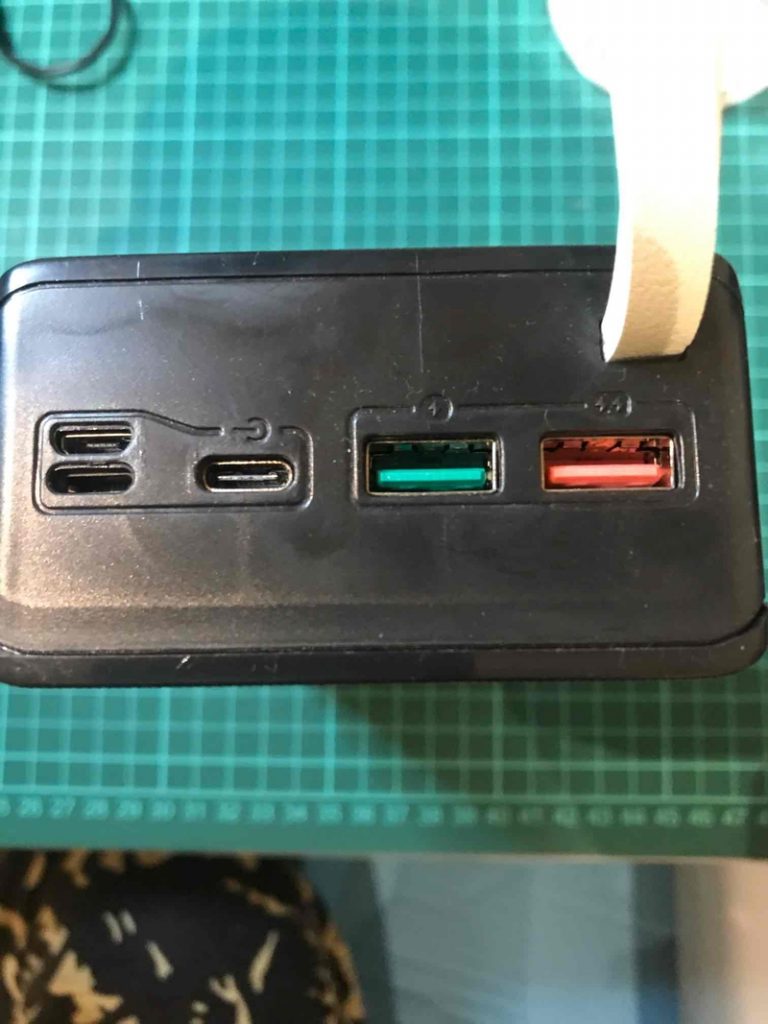
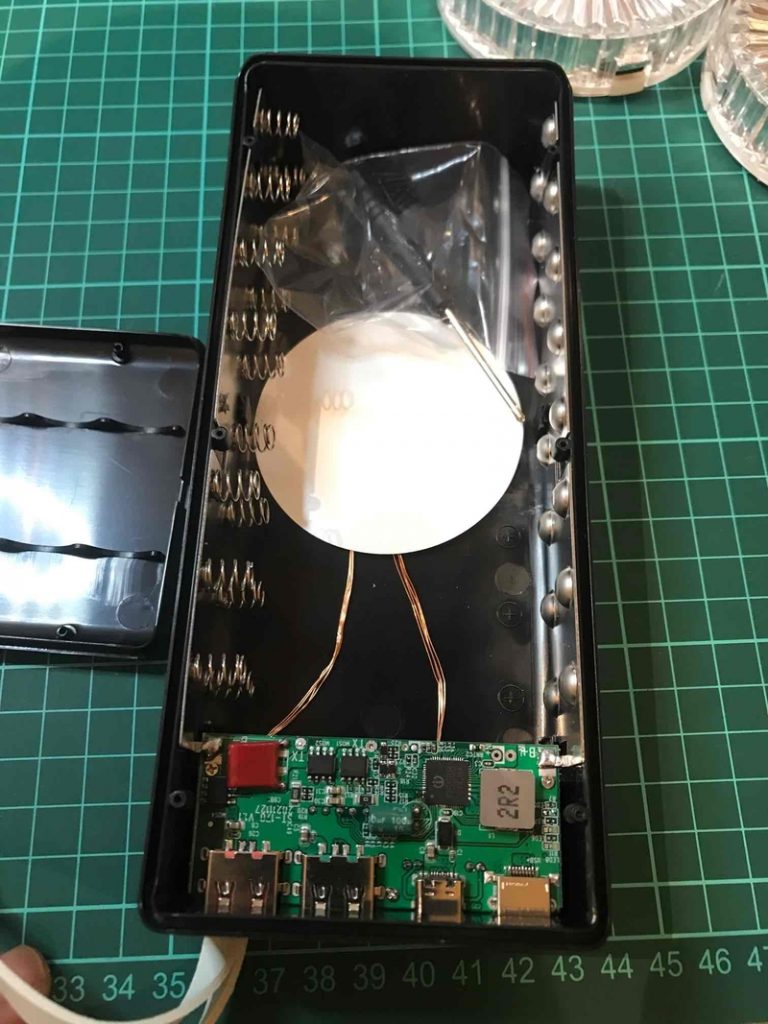
This review of the C16-PD-QI Removable 16-section Power Bank Shell Mobile Power Bank Assembly Kit Diy18650 Battery Box Wireless&Quick Charging Version also serves as a guide because I am not very good at keeping user’s manuals and data about the hardware I have.

Experiment number one, at what voltage does it stop charging, most chargers would stop at 4.2V which is the full voltage, while better chargers stop before that voltage, which is better for battery longevity !

Result: I had a few similar power banks that overcharged the batteries (Not good for the batteries), the C16-PD-QI bank stops charging at 4.2V on the dot, which is the maximum most batteries can handle, it’s not great, I would rather the charging stops at 4.18 for example (Or even lower)

Experiment number two, The wireless charger

Experiment number three, do any of the chips overheat

Does it accept a charge in QuickCharge

we already know it can quick charge devices, but also, on the box, multiple voltages are stated as input, so here I’m checking if it can get charged in quick charge

Specifications of the power bank !

The power bank specifications on the website seem to be different than the specifications on the back of the charger ! Close enough though

* Model: C16-PD-QI
* Wireless & Quick Charging Version: maximum power: 5V-3A 9V-2A 12V-1.5A 3.4V-5.5V-5A, wireless charging 10W
* Applicable battery: 18650 battery (length 6.5cm, straight down 1.8cm) But you could adapt other types of batteries as long as they are Lithium with similar chemistry !
* Note: The appearance of the battery should not be damaged, and the voltage should be between 3.2-4.2V. (Not sure what this is supposed to mean)
* Size: 44*80*186 mm

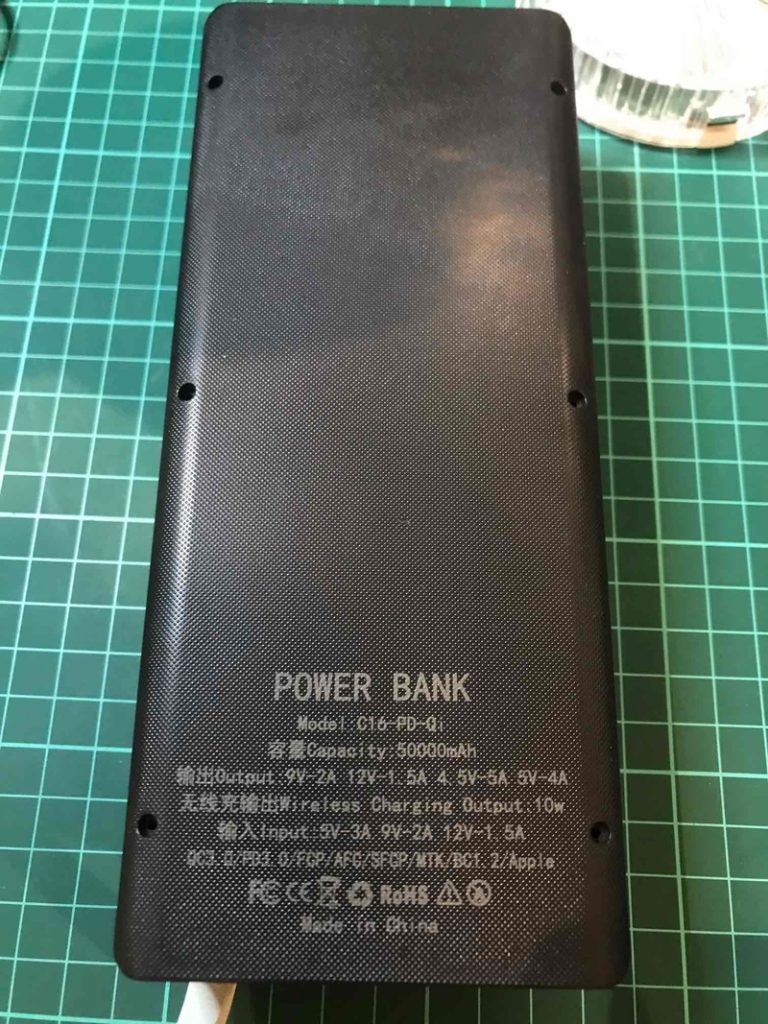
Backside of power bank

Power Bank
Model: C16-PD-Qi
OUTPUT: 9V-2A , 12V-1.5A , 4.5V-5A 5V-4A
WIRELESS CHARGING : 10W
INPUT: 5V-3A 9V-2A 12V-1.5A

Maximum charged battery voltage

I have previously bought power banks that are for laptops from this very same website, there was a little problem with those power banks, they charged the batteries above 4.2 volts, which is not good for the batteries, I would rather a power bank that charges my batteries a bit below the absolute maximum of most batteries, So here is my experiment with this power bank

The problem with used batteries connected in parallel

The best practice is to use factory matched batteries for this power bank, even though the actual capacity and internal resistance of the batteries is irrelevant (You can mix and match since they are in parallel), this does not apply to charging, lithium batteries are charged with a variable voltage depending on the current state of charge, batteries with less capacity will artificially deceive the chip into thinking we are at a higher state of charge, forcing the charger to up the voltage, where the better higher capacity batteries will suffer (The will produce more heat than designed, and cook themselves slowly to the capacity of the lower ones)

Remax TWS-10 Plus, not bad for $10 earphones

I got a pair of small speakers, the Remax-10 Plus which are priced at $10 !!! they come with a power bank to recharge the earpods, and a pair of earpods that simply work, the sound on the other end of the conversation is lower than when you are using the handset, but if you raise your voice a little, they work fine for me

the battery life is more than you might need, and the box (Power bank box) is small and can recharge the speakers a few times

the only thing that is annoying about it is that it charges with an iPhone cable, one of which is indeed shipped with the box, but i would have preferred a USB C cable !

Anyway, I am creating this post so that i can tell you a bit about the speaker, but more importantly because i need the user manual handy 😉 since i accidentally switched to Chinese and now i want to switch back again, so i had to look for the manual that came with it!

REVIEW: UGREEN HiTune X5 TWS earbuds

UPDATE: After around 2 months of using the earbuds, I am facing no problem, calls are clear, battery life is good, the difference in price between those and the $10 remax speakers is definitely worth it ! if i have one complaint about them is that using the touch button (the whole part of the speaker outside the ear is a button) takes some getting used to, I will also post the instructions on how to use them here.

After trying the $10 Remax TWS-10 Plus, i decided to check out and review the $40 UGREEN HiTune X5 TWS earbuds with Qualcomm aptX

The earbuds come with 4 sizes of ear tips, x-small, small, medium and large

  • HiTune X5 True Wireless Stereo Earbuds
  • Qualcomm chipset: True Wireless Mirroring  tech with the Qualcomm QCC 3040
  • Version: Bluetooth 5.2
  • ENC noise cancelling
  • Frequency range: 20Hz-20KHz
  • Latency: 70ms
  • 4 microphones with cVc 8.0 Noise Cancelling Technology
  • Ipx5 waterproof
  • 70ms ultra low delay  for  game mode
  • Profiles: HSP, HFP, AVRCP, A2DP
  • Bluetooth Frequency: 2400MHz-2483.5MHz
  • Bluetooth Range: 10m
  • Codec: Qualcomm® aptX™, AAC, SBC
  • Speaker Impedance: 32Ω±15%
  • Speaker Sensitivity: 100±3dB
  • Driver Speaker (Dynamic driver): 10mm PU + Peek Diaphragm
  • Operating Time: 7h music play on a single charge, 21h case, total 28h music play with charging case
  • Charging case capacity: 400 mAh
  • Earbud battery capacity: 40 mAh
  • Charging case input: 5V=320mA
  • Charging case output: 5V=100mA
  • lithium polymer battery
  • Charging port: USB-C
  • Fully charge the earbuds: 1.5H
  • Fully charge the case: 2H
  • Earbuds dimensions: 21.926.328.6mm
  • Package Dimensions: 100*139*44mm
  • Net Weight: 5.1g(0.18oz)
  • Total Weight: 47.6g(1.68oz) in the box
  • Waterproof: IPX5

with the HiTune X5 earbuds, the box contains 4 x Interchangeable Ear Caps, a charging cable, a charging case, and a user’s manual

Up to now, the Microphone is much nicer than the Remax, in the car, with the AC on at medium, the other party had no complaint’s about sound quality.

Even though the processor, the Qualcomm QCC 3040 is the most relevant chip in the earbuds, the truth is, the quality of the other components is very important, the microphones, the speakers, the power bank, etc… so it is very hard to endorse any other pair of earbuds simply because they have the same chipset.

A simple google search yeilded many other earbuds that use the same chipset, but again, having the same chipset does not mean much…

  • EarFun Free 2
  • Tribit Qualcomm QCC3040
  • Tronsmart Onyx Ace Pro
  • SoundPEATS Air3

Shrinking a disk partition under Debian 11 bullseye

As usual, I will start by getting to the bottom of it, then explain everything

first, you need to first shrink the file system, then the partition where the filesystem resides, replace /dev/sda4 with whatever you partition is named

1- Shrinking the filesystem

Unmount the partition to be resized,

umount /mountpoint

otherwise you will get a message such as

Filesystem at /dev/sda4 is mounted on /mountpoint; on-line resizing required
On-line shrinking from 30453104 to 98098 not supported.

The following commands are relevant to the program resize2fs, they are hands on examples of use, take a close look at the description of what each does before you proceed by picking how you want to use the command.

* Show the minimum size we can squeeze this partition to without losing data
resize2fs -P /dev/sda4
* do the filesystem resize to the MINIMUM possible size (the number you ended up with in the previous command)
resize2fs -M /dev/sda4

The command above moves all data to the beginning of the filesystem/drive, then shrinks it to the smallest possible size.

2- Shrinking the partition

2.1- Find the boundaries of the file system with fdisk

3- You are DONE

If this is it, why is there much more in this tutorial, Simply put, what is above does very little explaining, if you want to understand what we did, you will need a bit more

the assumption, I have a partition that only has 5% data, I would like to shrink the partition to ten percent of it’s size.

Unlike windows, where your luck of where the data resides, you can always shrink a Linux partition to whatever size fits the data that is on it (without losing data)

in this tutorial, I will assume the partition is /dev/sda4, you will need to replace that with whatever your partition is.

1- collecting information about our partition

fdisk /dev/sda
then the p command for print

df -h
this should show you all the partitions, info about them and where they are mounted and how much space is used

the file system can be shrunk with resize2fs

the command “resize2fs -M” should first move the data to the beginning of the drive, then shrink it

first, how large is the file system ATM
tune2fs -l /dev/sda2 then multiply by block size