Every model is a different story, but before you start looking into models, there are a few useful things to know, and a few useful tools that you can use.
NVIDIA
Nvidia is a very popular AI hardware provider, the cool things about modern AI models is that they can be split into layers, hence, you can have more than one card doing the work ! So, I have 2 x 4090 cards doing the work, you can combine the ram to see if your model fits on both when split in half, some models even provide an option to offload some of the model’s data onto the system ram, other have the option to load part of the data into VRAM as needed ! but that is a story for another day (Another post)…
To inspect the GPU and RAM usage of your GPUs, you can use the following command
watch -n 0.5 nvidia-smi
The command should show you what processes live in your VRAM (VRAM is your cards ram)
From other posts like this one, I seem to always be complaining about the 209 E200 W211, The thing i never mentioned is that I have an even older Mercedes E200, A W124 that has been parked for 8 years and decided just now to revive it.
for one, there is a water leak in the cooling system, for another, it has no gas in it, and the fuel pump is not working !
I recall from 8 years ago someone telling me “I can smell gas” While the car was parked near us ! So i am guessing, there is a small leak that is leaking out the gas
Not long before it got parked (8 years ago), the car had a serious leak (Leaked a full tank in a day) and I had to change the hose that connected the fuel tank to the fuel pump that is under the car !
Here are the specs, and this is post is all about how I plan to bring this car to life in a few days !
My Mercedes 200 E (W124 – E200)
Transmission: 5 Speed manual transmission
Engine: 111.940 (Wikipedia) (Check if part is 111 010 8700 on xentry/das)
It has that different looking steering wheel and shifter, If i recall right, this variant’s name has the word sport in it (probably sports line), but I am not sure what it was called exactly, I recall this info because I had to get the steering wheel shipped from Poland as no used or new parts dealer has ever seen it before
Diagnostics/OBD2
Well, this 1994 E does have a diagnostics port, but it is nothing like OBD2 (It is OBD1 not 2), it is very easy to read, just connect any LED (use a 12V LED, or adapt an LED for 12V with resistors obviously).
The 16 pin connector can be accessed with banana plugs connecting the LED to the flowing
The users manual does not go into sufficient detail concerning the (HFM Sequential Multiport Fuel Injection/Ignition System (HFM-SFI))
The OBD plug can be accessed with a scan tool (Ex: HfmScan) using the diagram below, if you insist on going into that rabbit hole, there are adapters (OBD2 to banana) like the one you see here, which connects the OBD connector to the following pins (OBD breakout cable 4 colours)
Now, I prefer using the LED method
Degrading wires (Mercedes and Porsche !)
Why I think claiming that the degrading wires were “intentionally installed for easier recycling” is a bullshit attempt to cover Mercedes benz’s unforgivable failure on those models
Having an arcing wire right next to the fuel pump is an even worse failure than the failing to predict that the wires will bio degrade
Giving a rust insurance of 30 years, and having the wires degrade after 10 ? doesn’t make any sense, You are implicitly telling the consumer you are expecting the car to live for 30 years, having its cables degrade starting after 10 years with the most dangerous ones, and eventually degrading to the extent that fixing it is not feasible contradicts the assumption of expected longevity !
Assuming the above is not correct in the sense that not all wires degrade, only those exposed to heat etc… defeats the purpose they claim the wires were scheduled to degrade for
To revisit
When your primary concern is getting it to run, you will come across stuff that needs attention after, here is a small list
The wires to the fuel pump need shrink wraps
Distilled water to be swapped with antifreeze
Shopping list
I don’t think this will be a long list, but I am mentioning what I needed here so that if you are in a similar situation, this might remind you of what you might need
Both kinds of polish compounds
Retouch paint, and application thingie
Thinner (To clean spray gun after)
Clear coat
Clean, lint free cotton
Masking paper
Electrician’s tape
Gasoline ! since it probably evaporated
A 12V tester (Usually in the form of a screw driver with a wire hanging out from the back to go to ground/Negative)
A 12V car battery (The one in the car is 100% toast)
Distilled water for the radiator (Add antifreeze later)
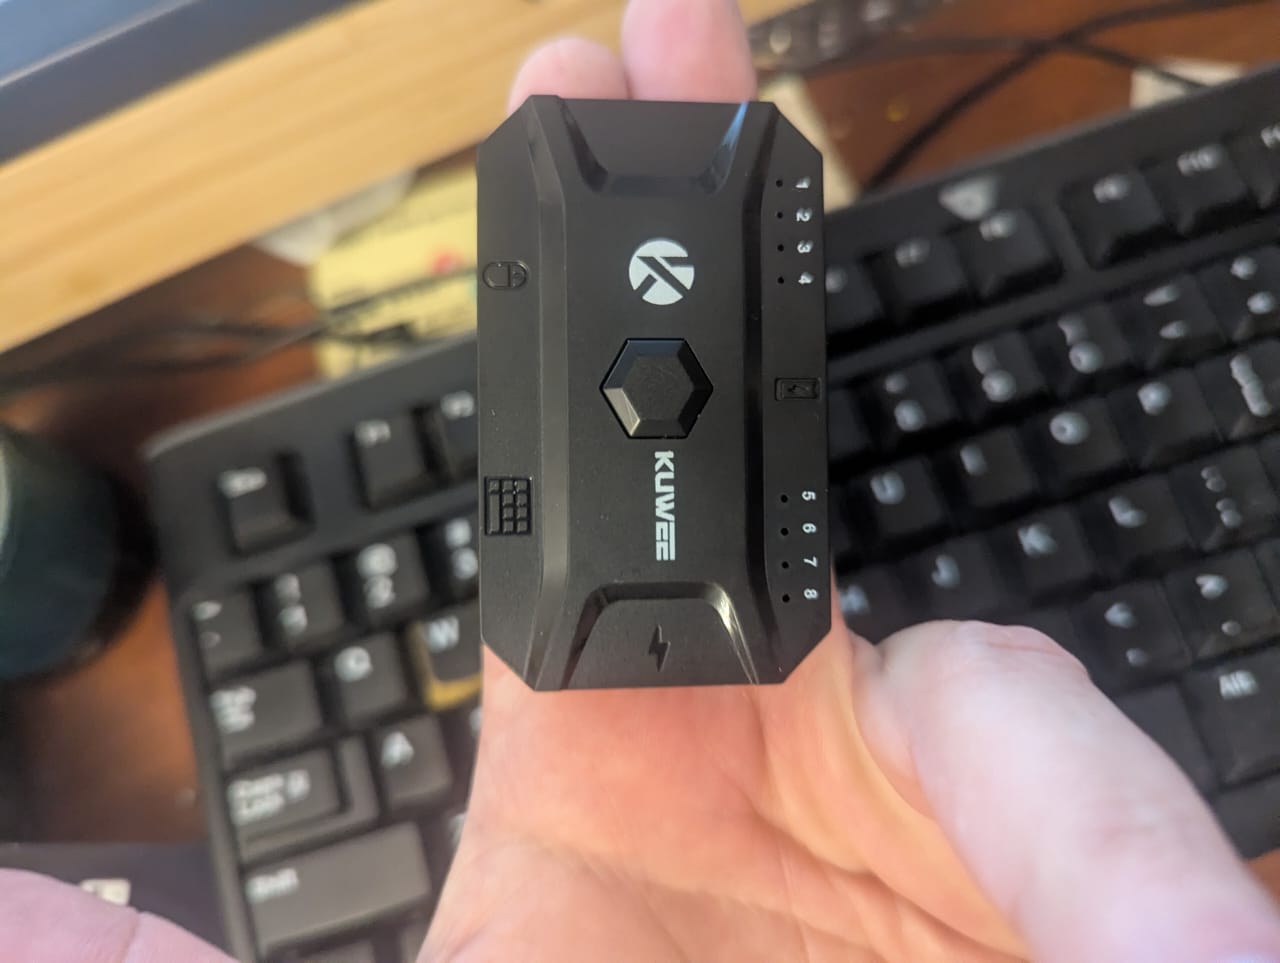
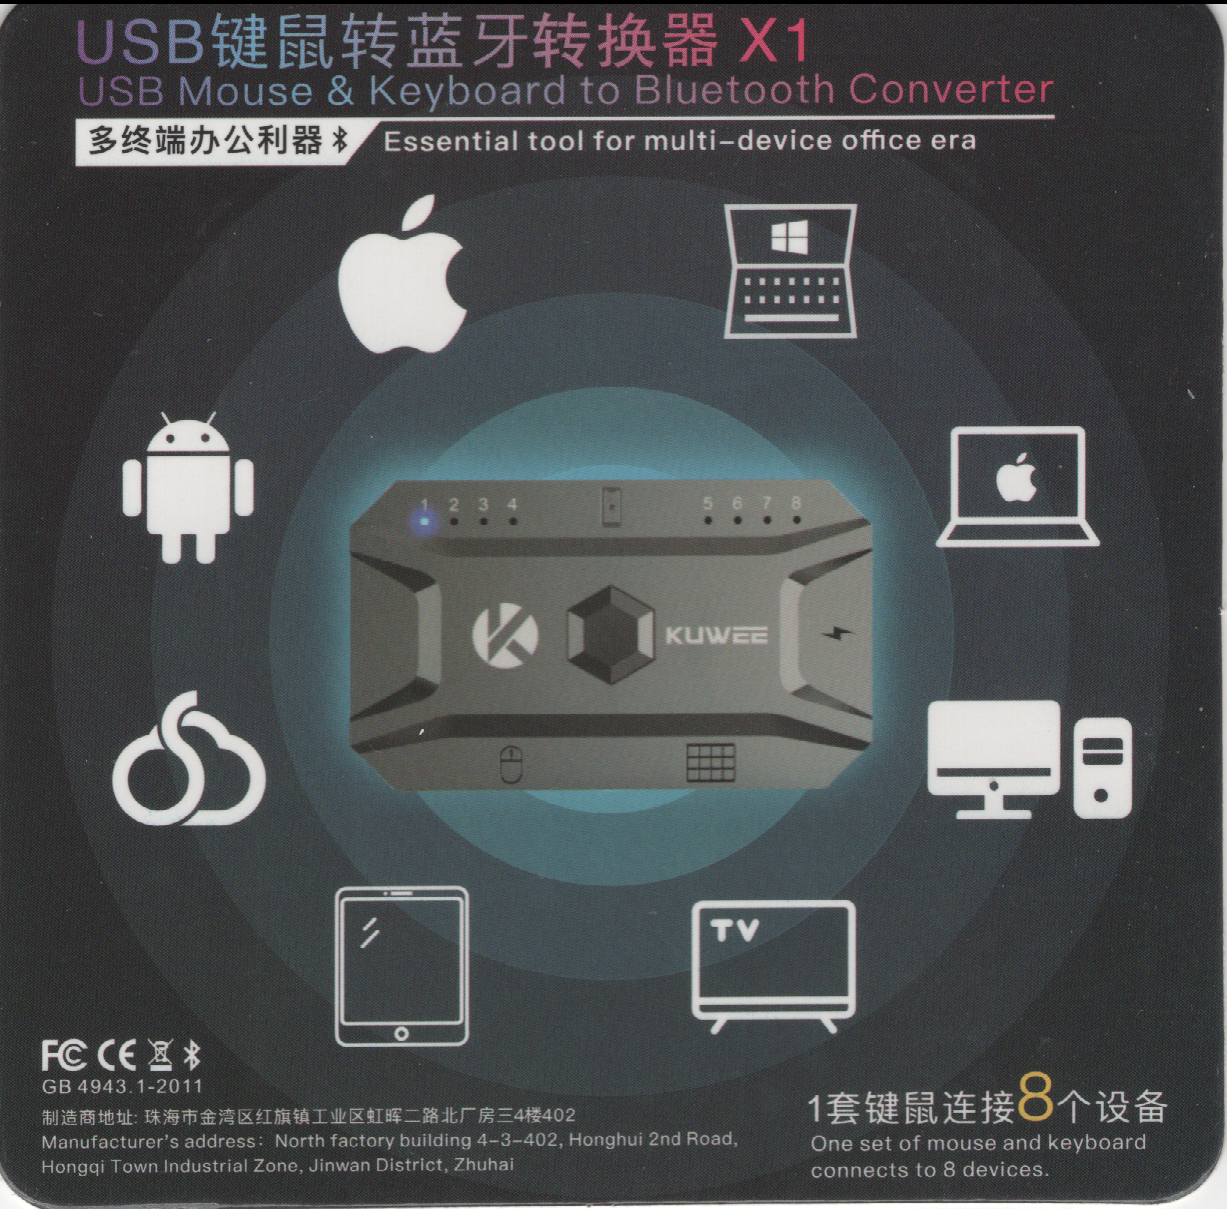
I found this adapter on Ali Express, the KUWEE Bluetooth 5 wired keyboard and mouse adapter, it should connect my beloved wired keyboard and mouse to my PC through Bluetooth 5, to any of 8 Bluetooth enabled devices
I got a few of them for a very nice project of mine, but more on that in another post !
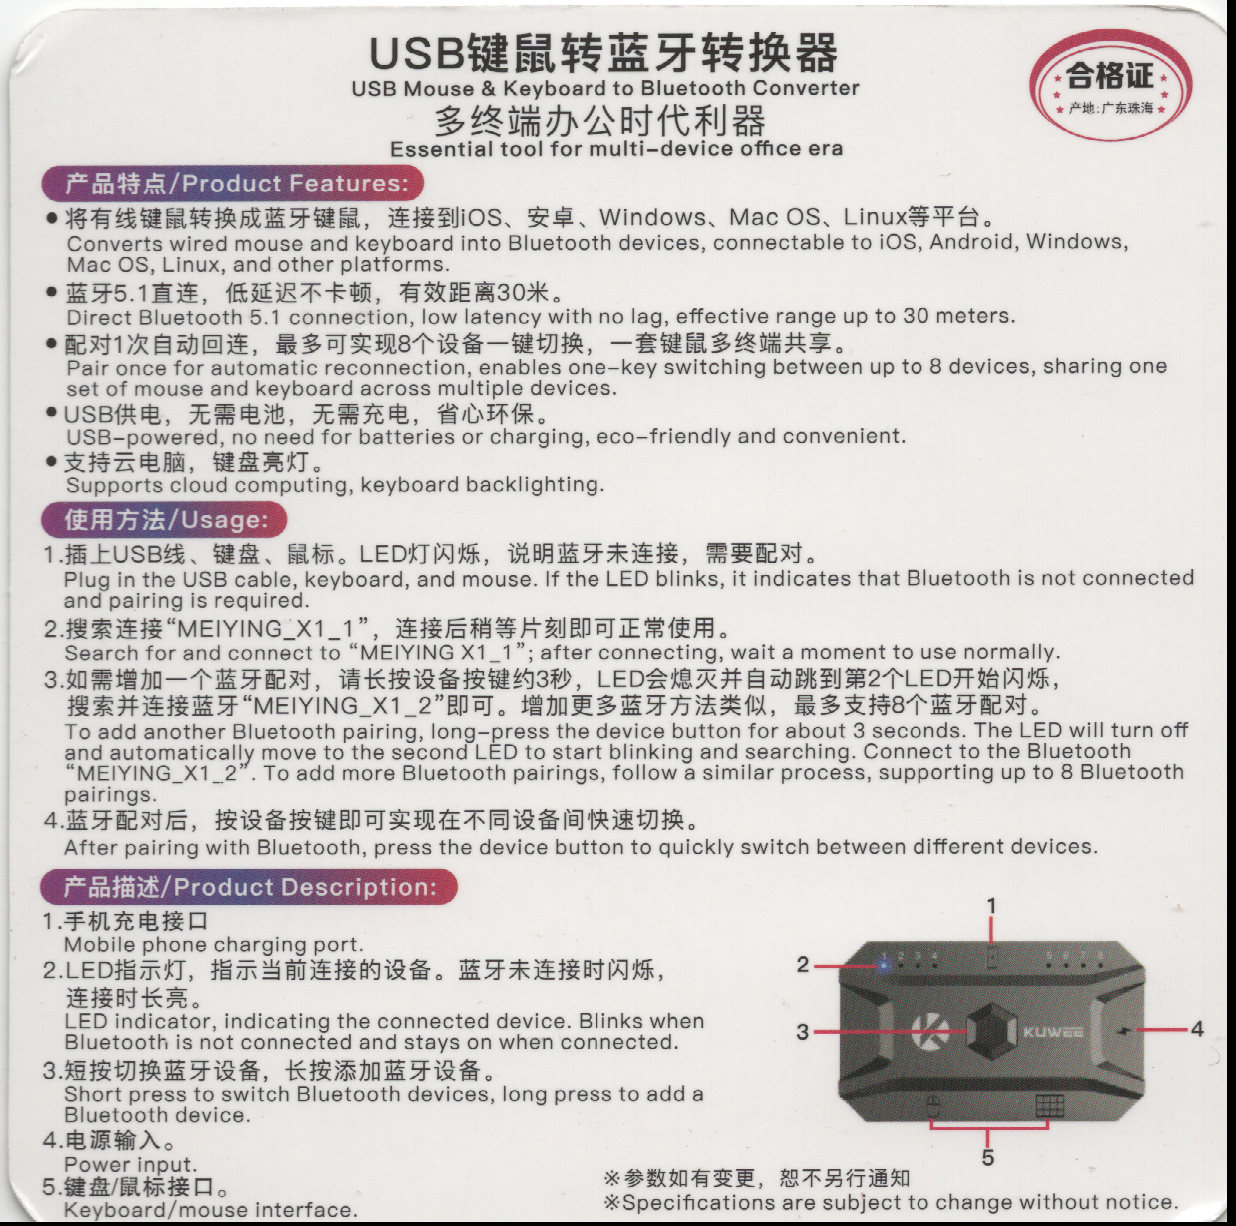
According to the seller, here are the features of the device
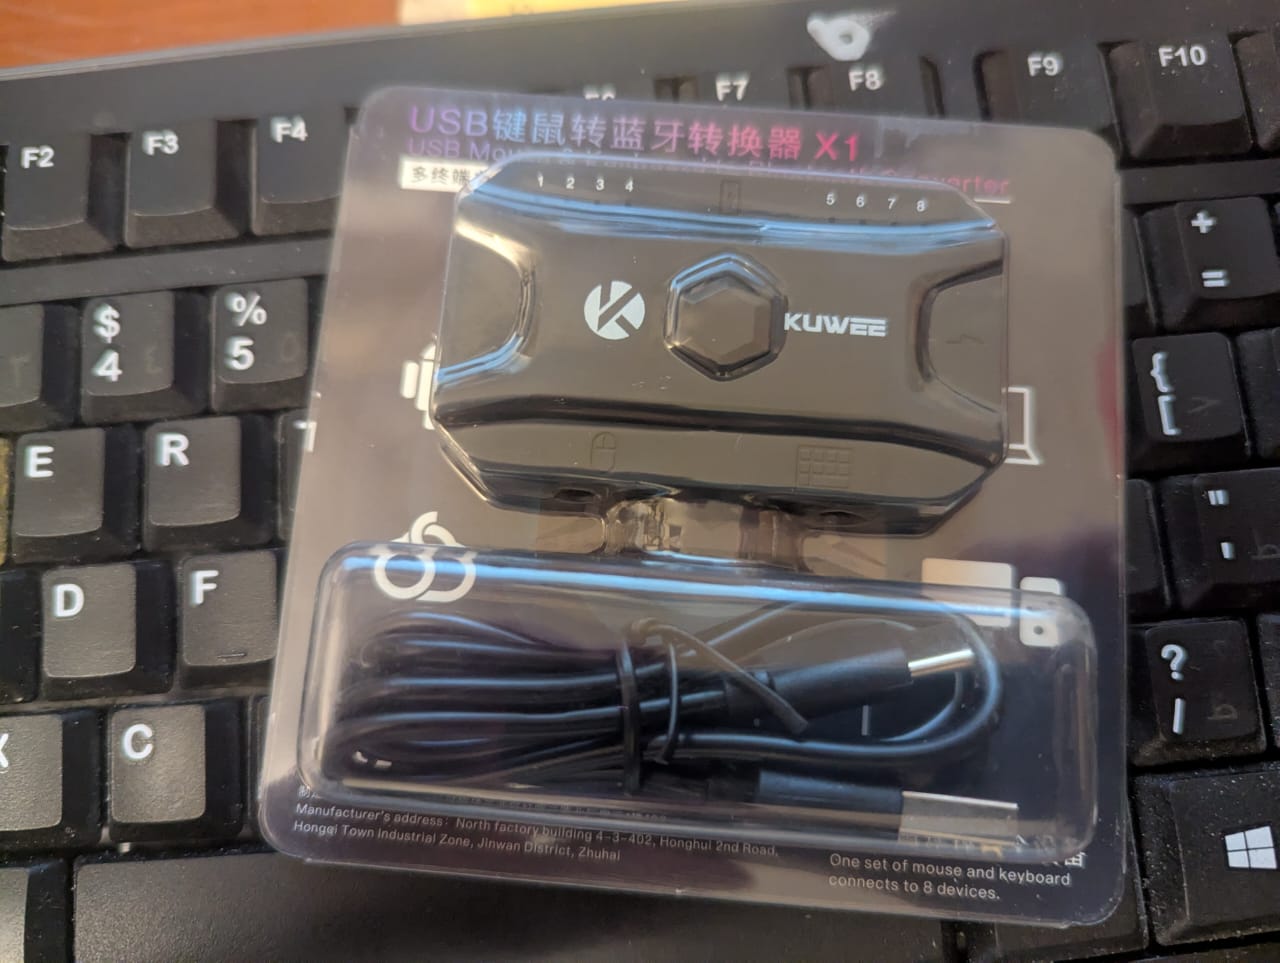
Package Contents: 1 x Gaming Keyboard Mouse Converter.
I am still looking for all the specs, but i think I found what I was looking for and am here to share this
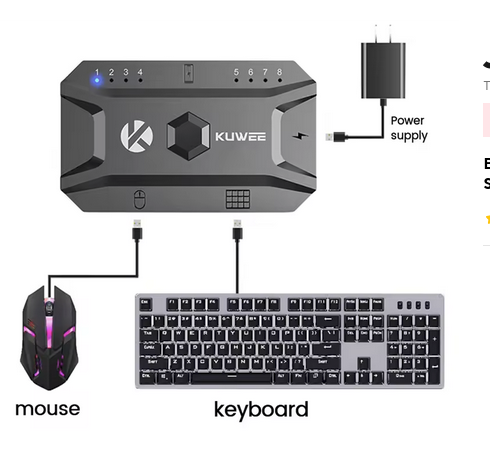
Note: The device works fine with my wireless keyboard and mouse in 1 dongle (I used the keyboard port for the dongle), I understand it defeats the purpose (2 wireless hops), but just in case you have a reason to want it to work with 1USB that carrys both keyboard and mouse, there you have it, IT WORKS
1- Circulating through output: Switching output devices using the physical button on the device is inconvenient, you have to go through up to 7 clicks to get back to the one right before the one you are on (This is assuming all 8 slots are programmed, if you only programmed two devices, you only have to click twice to come back to the device you are on) !
So the answer is a shortcut, something a la KVM devices that intercept keyboard strokes as shortcuts, so the 8 inputs can be mapped directly to the 8 numbers on the keyboard with the following shortcut
Ctrl+Alt+Shift+1/8
2- Resetting the device: another shortcut that might come in handy is how to reset the device, here is the shortcut
device physical button + F1 on keyboard for 15 seconds
So, There you have it, the most useful two shortcuts that can mean the difference between convenient and inconvenient !
3- Multimedia buttons !
According to a random screenshot on my phone, the device adds multimedia buttons when you don’t have any physical ones !
Ctrl + Alt + Shift + Esc = Multimedia Keys on / off
Ctrl + Alt + Shift + F1 = iOS soft keyboard on / off
Ctrl + Alt + Shift + F2 = Volume Down
Ctrl + Alt + Shift + F3 = Volume Up
Ctrl + Alt + Shift + F4 = Mute
Ctrl + Alt + Shift + F5 = Previous
Ctrl + Alt + Shift + F6 = Next
Ctrl + Alt + Shift + F7 = Play / Pause
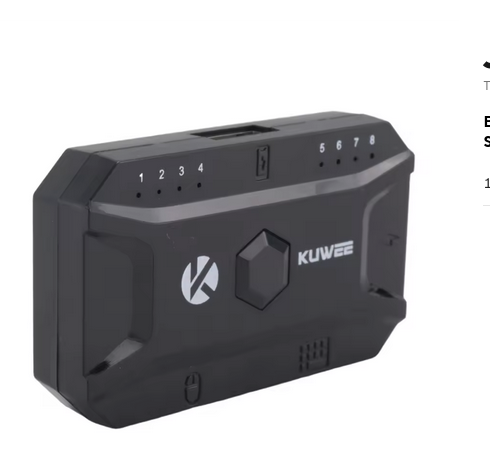
4- The USB output at the top: I don’t think it has any function other than sharing the power source to for example recharge a phone or something, not a very useful feature, but knowing what it is would at least answer your curiosities !
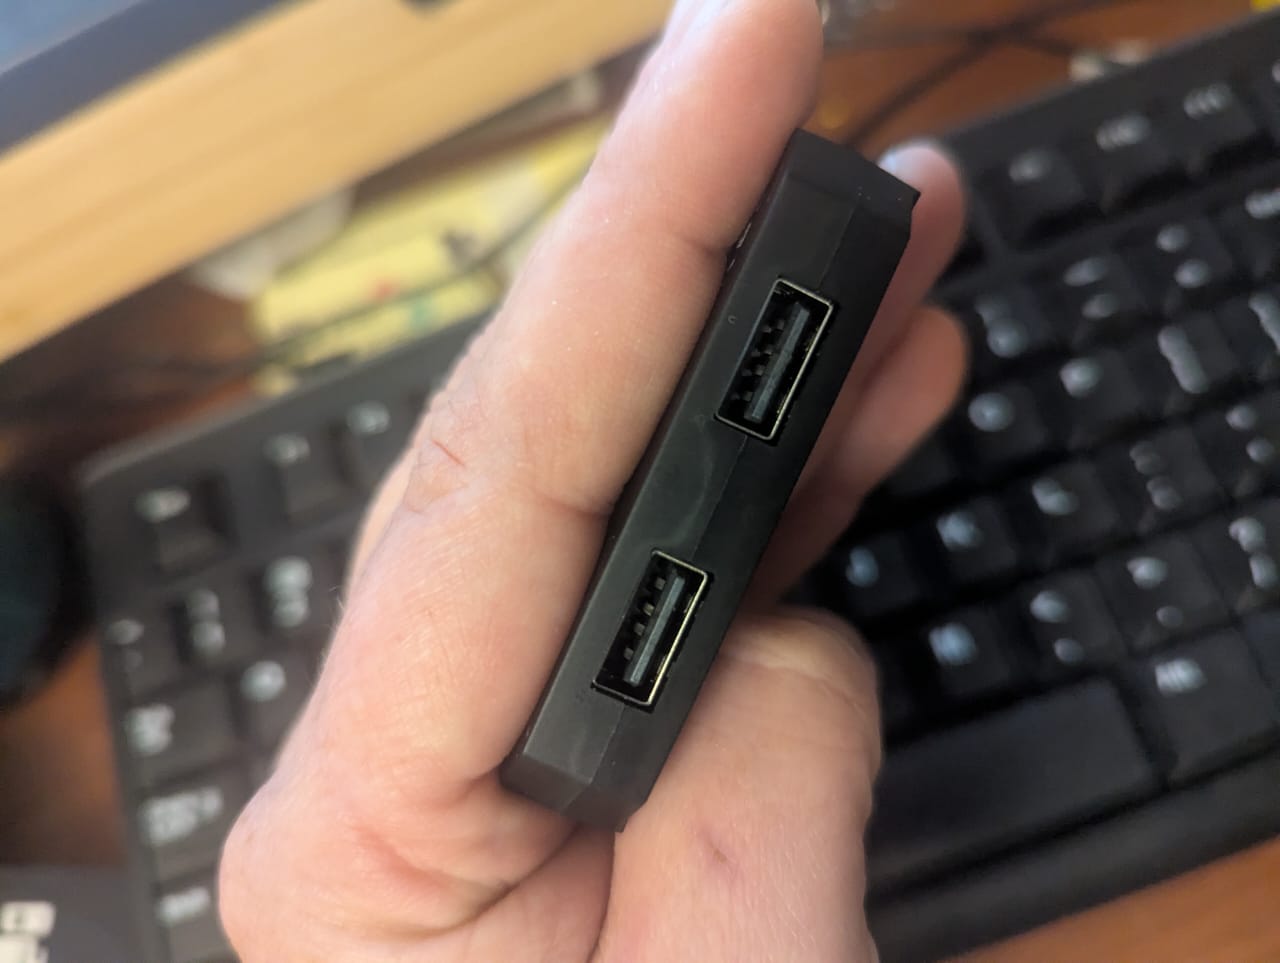
5- Size
For our American friends who would rather use any unit of measurement except for SI, the device itself is two fingers wide and less than one finger thick, and 3/4 index finger long, like in the photo below, as for everyone else, the dimensions of the device are 67x40x14MM
Here are some scans and photos i took for my future reference
So, here are a few photos of the device from the website, here for my reference
There is also another branding of the same external box at a much lower price (Photo below), sometimes less than half the price, but since i will have to wait a couple of weeks for it to arrive, I had to get the above because it has many more reviews, I would bet the other box is exactly like the one I got, but oh well, just a few dollars difference to spare me disappointment isn’t a big deal
And there also seems to be another device that shares the same input and output and description and I would bet it is them same device in a different shell, it looks like the one below, and it is also available in the KUWEE brand…
In the context of my AI notes, here is what you need to know about the .env file
Any file that starts with a . is a hidden file according to linux, windows is a bot funny about such files, it allows their existance, as long as you don’t try to use windows explorer to name or rename into them.
On linux, if you want the ls command to show such files, you would execute the command “ls -a“
Now, with that out of the way, let me start with a few variables for various providers
# Open AI (ChatGPT)
OPENAI_API_KEY=sk-proj-xxxx
# Google AI (Gemeni)
GOOGLE_API_KEY=xxxx
# Anthropic (Claude)
ANTHROPIC_API_KEY=xxxx
# Huging face (HF_TOKEN is short for hugging face token)
HF_TOKEN=xxxx
While the ChatGPT app can be accessed through, the API portal is at platform.openai.com, and even though the website provides a free tier, the API does not, you must have prepaid credits in order to use it, the minimum is $5, those $5 are pay as you go, you use them up by sending more API calls.
GPT 4o is rumored to be 10 Trillion parameters !! for comparison, deepseek, which is an amazing LLM that came out lately is 671 Billion parameters, meaning it is 7% of the size of ChatGPT !
If you are familiar with python, you probably are also familiar with pip, and very likely familiar with venv (Virtual environments)
There is nothing special in particular about this for AI, it is exactly as you would for an odoo installation for example
For AI, i would totally recommend anaconda, but if for some reason that is not an option, this option will do 100% of the time
So, you need to start by installing Python 3 !, On debian, I would just use the repository with apt, it may be true at the time of writing that in the repo it uses 3.11 rather than the latest 3.13, but that is absolutely fine
sudo apt update
// The following command should do
sudo apt install python3
//But i would much rather install everything python in one go
apt install build-essential wget git python3-pip python3-dev python3-venv \
     python3-wheel libfreetype6-dev libxml2-dev libzip-dev libsasl2-dev \
     python3-setuptools
Now, with that out of the way, navigate to the project’s folder (Assuming you have downloaded a project for example), and create a virtual environment
python3 -m venv venv
Now, you can activate that project with
source venv/bin/activate
//On windows, the above should look something like
venv\Scripts\activate
That is basically it, you will now need to, from within the command prompt of the venv, install dependencies either one by one using the pip command, or point it to a file containing the dependencies, for example
It appears to me as though the name is also a pun, a short notation for the word collaboration, and also a CO-Lab as in Jupyter lab
We use cookies to ensure that we give you the best experience on our website. If you continue to use this site we will assume that you are happy with it.Ok